My first Quilt

It’s just going to be a little blog post this week as all of a sudden I have started to struggle with the heat. It is again ( as it was like this in the same week last year) much hotter than it would normally be in the UK for the time of year. The last few days I have been struggling with muscle weakness. One day I found myself unable to chew – must be my idiopathic hemifacial spasm playing up…. ***sarcasm*** because it went with an additional dose of mestinon. Obviously the placebo effect ….**sarcasm**


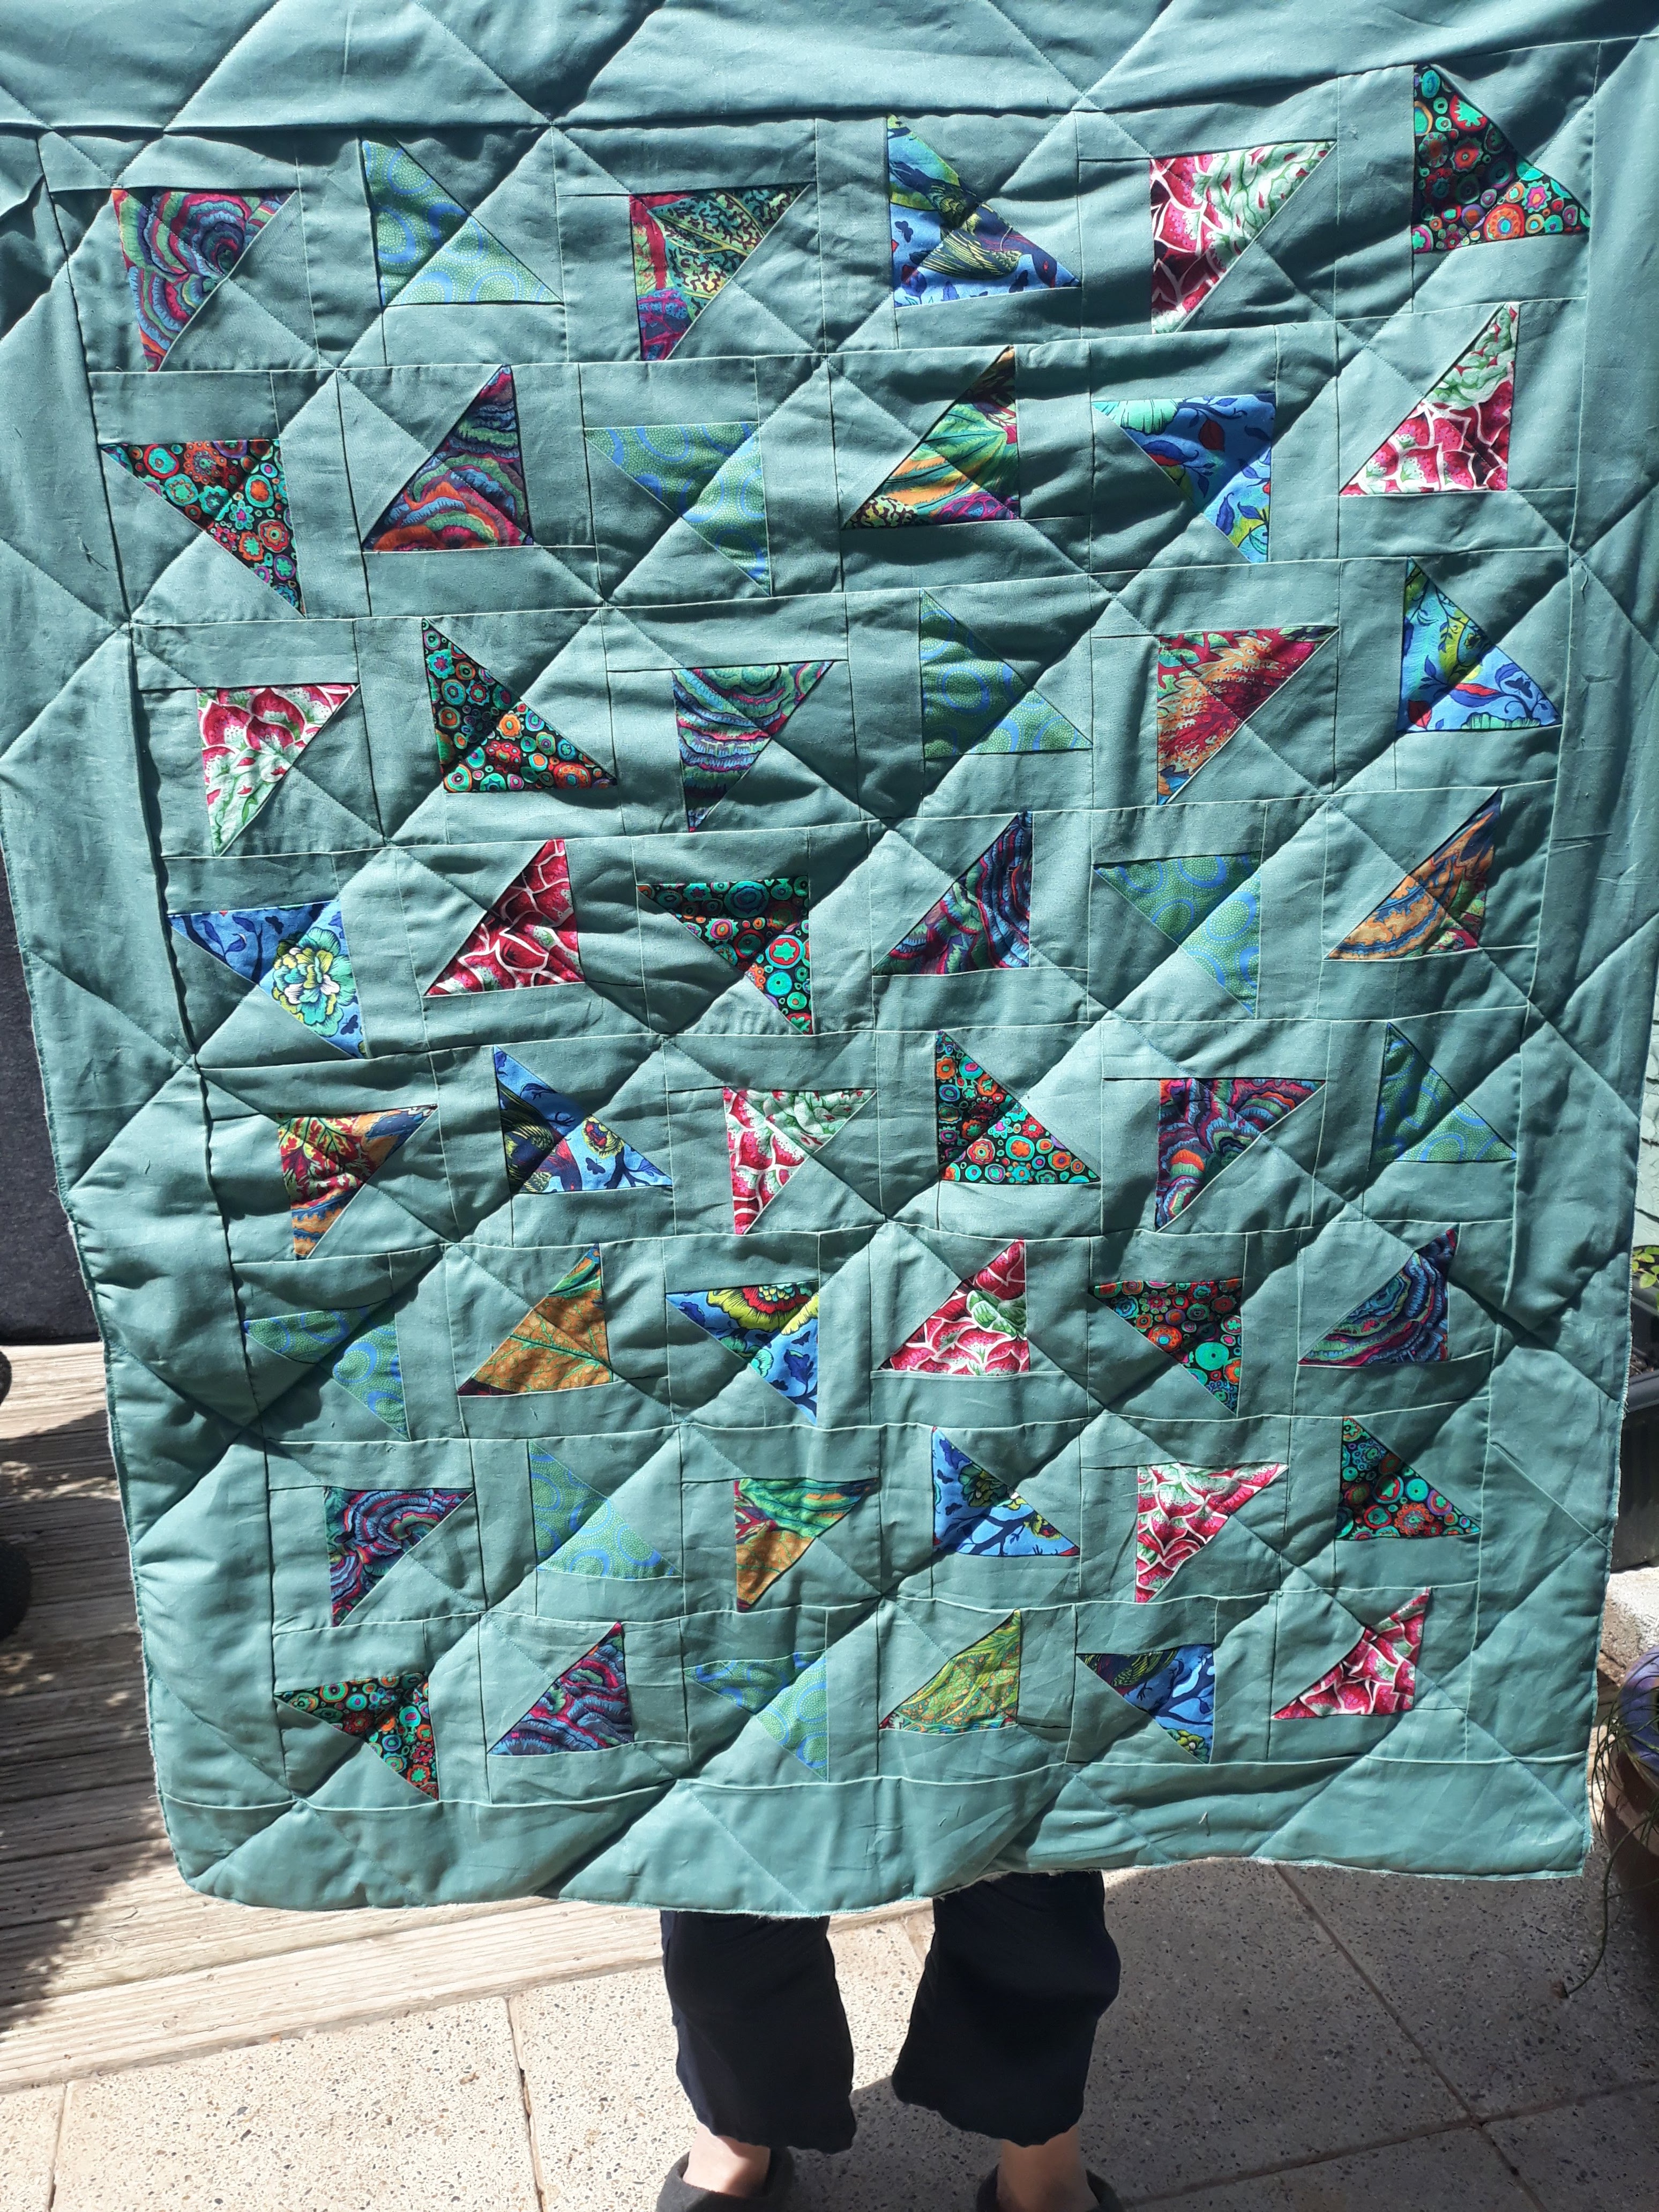
Around the middle of May I posted about my trip to the dentist and the fabric shop, where I chose the fabric I was going to use for my first ever proper quilt. Not a quilt as you go where the blocks are all laid out for you but an actual proper quilt. I had seen a quilt design I liked called “Floating Triangles” in a magazine called Simply Sewing designed by Janet Goddard. I loved the minimalist look of it and thought I’d love to make something like that.


So that was it, on a whim the fabric was bought and then it sat on my shelf in the kitchen until June 2nd, when I decided to start cutting it out.


A few days later I started to make the half square triangles (48 in total). I must be strange as I enjoy all aspects of sewing, it’s the cutting out I find hard but that’s been made a lot easier with my new creative grids stripology rulers. However for all the squares I had to cut out I couldn’t use my new rulers as they needed to measure 4 ⅞ inches. Typical! So I ended up making a cardboard template. I am useless at drawing straight lines, I really need to buy myself a set square to help in situations like this. I have already invested in a compass for the centre of my Dresden Plate designs!


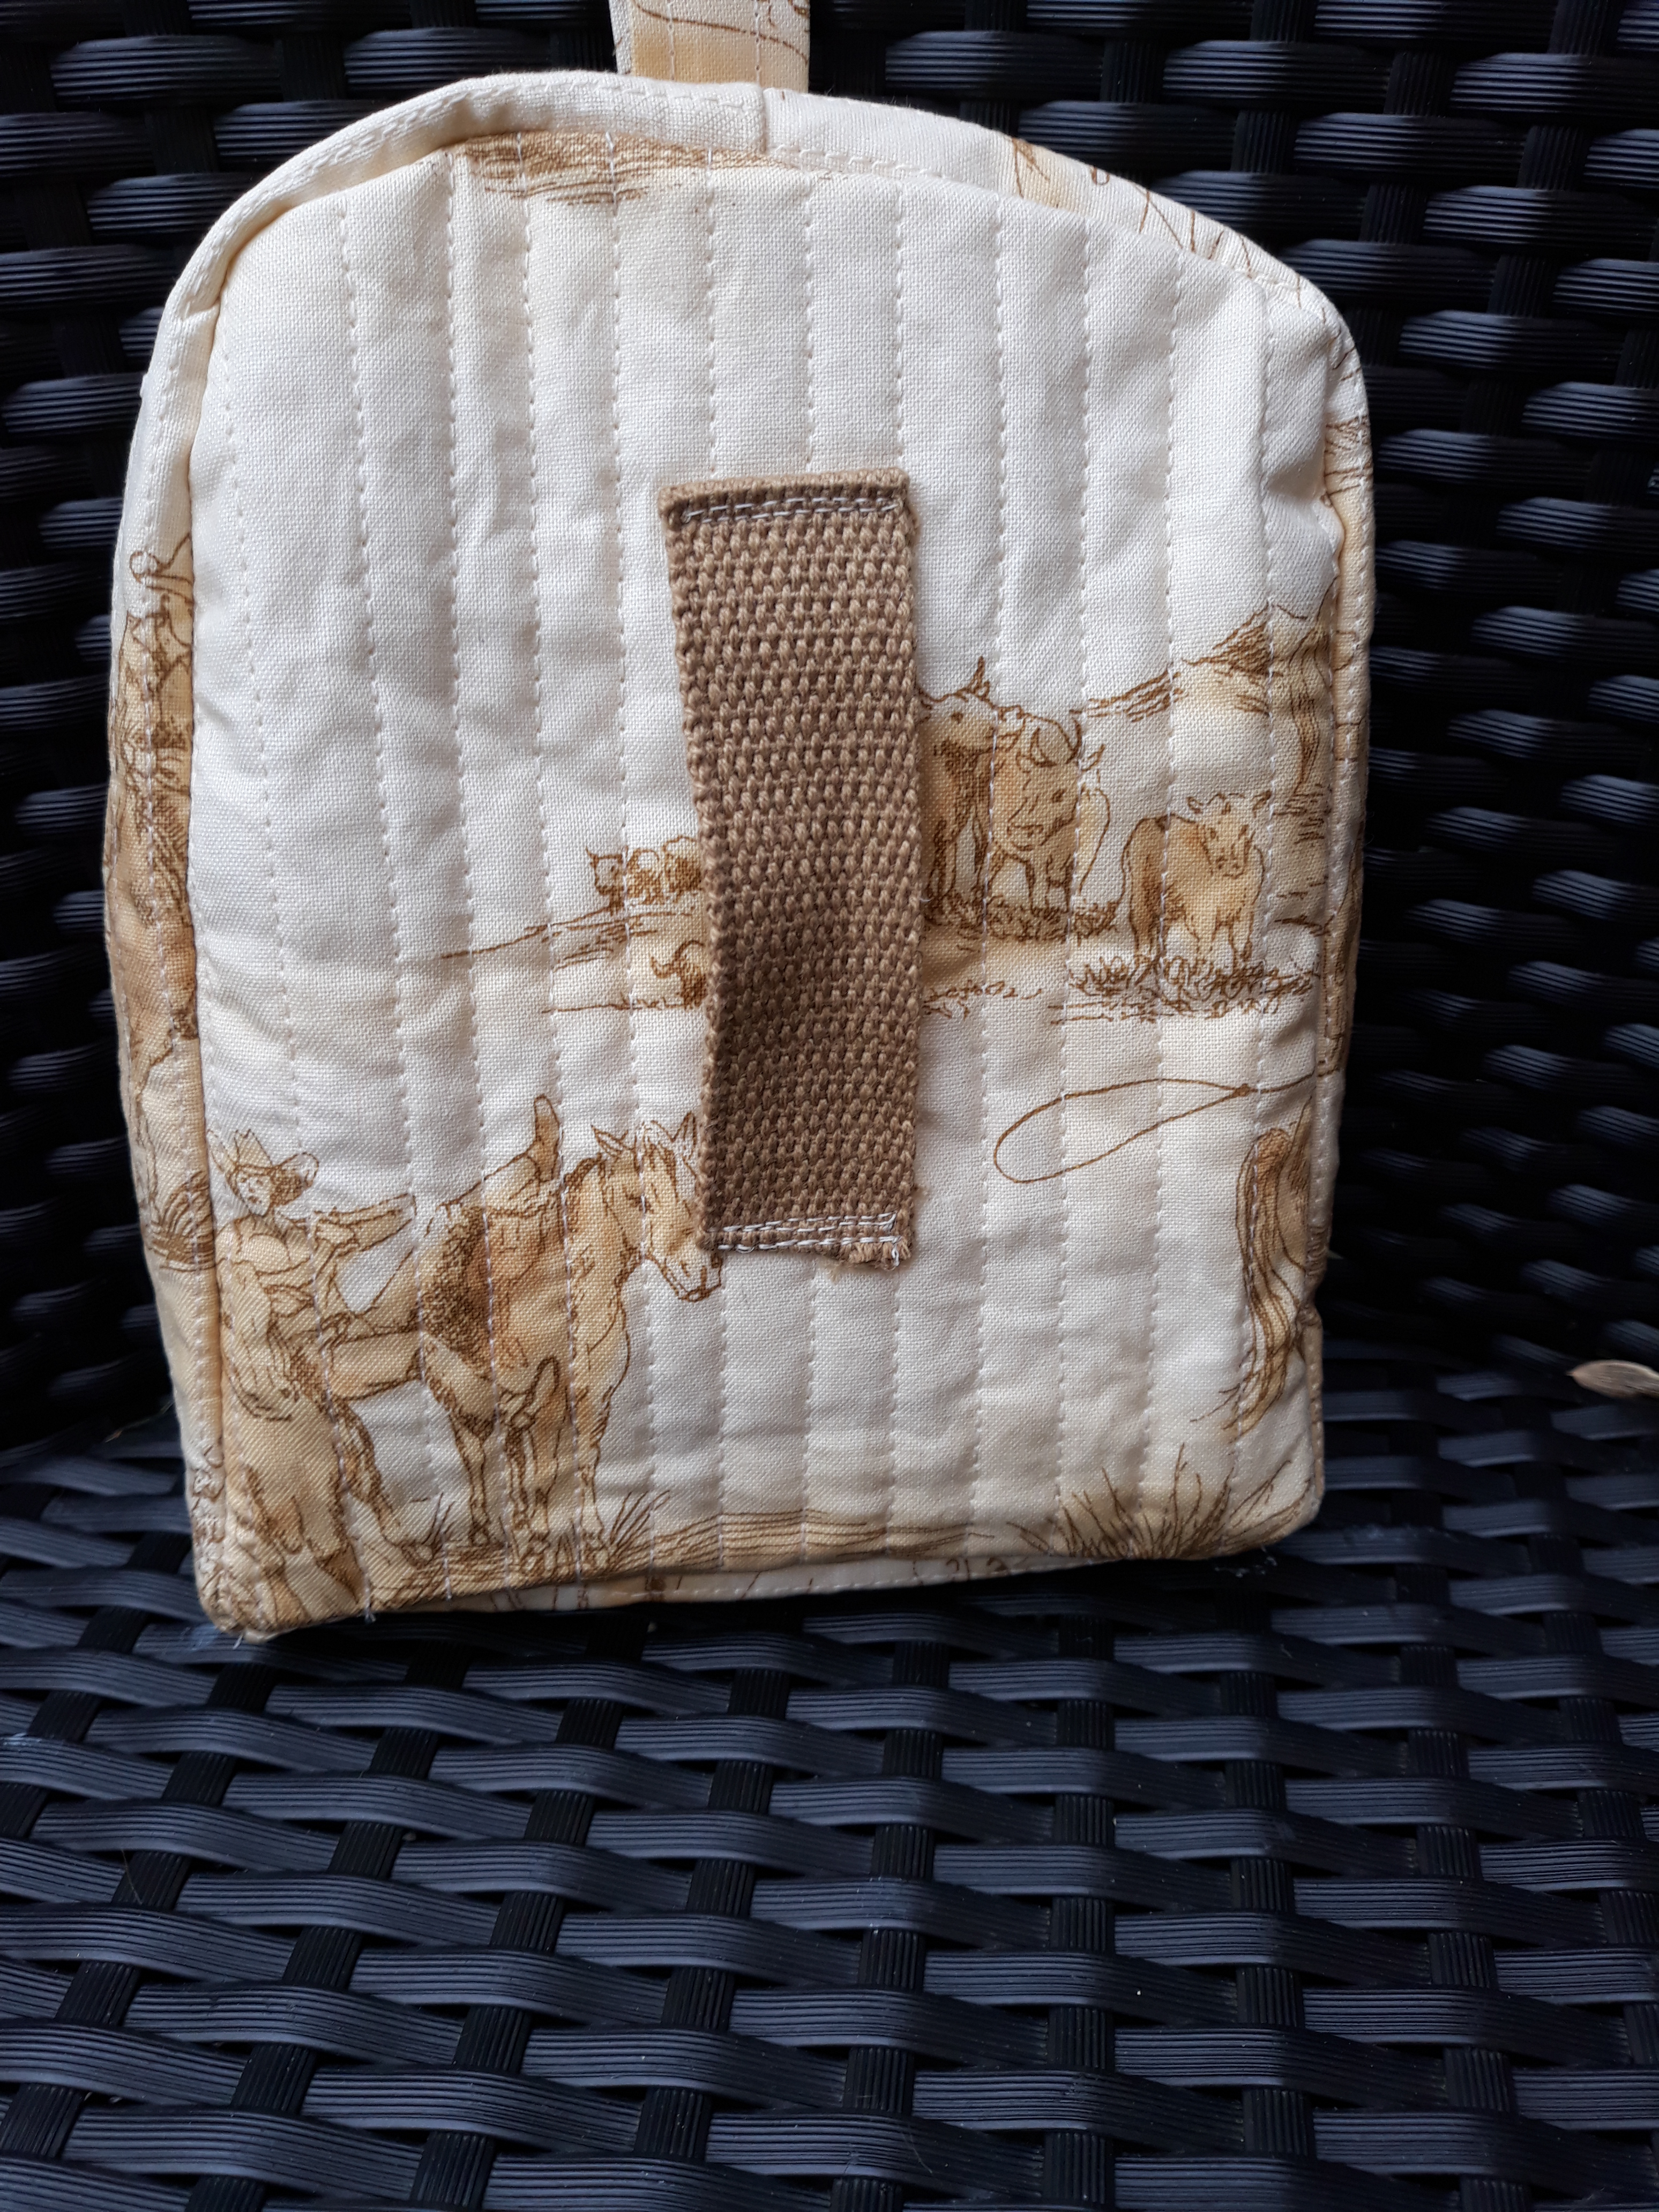
The following day I started adding the strips to my half square triangles. Unfortunately I was a little over eager on my trimming of my half square triangles and found that I had to remake a load of half square triangles as they were so much smaller than the others and it would have made the rows wonky. I think in total as further down the line I had to make some more blocks I probably had to remake 10-15. Its annoying but I have kept them all as I will sew them together to make a bag, as I love the fabrics I chose for the quilt. I also had to buy more backing material due to my many cock ups with measuring. Thankfully with the new rulers those should be less!


Oh I forgot to tell you about my EPIC mistake of accidentally having two rotary cutting blades on my cutter. How did that happen? Well I bought some expensive blades and they were all covered in oil. I am guessing when I replaced a dull blade I didn’t check properly that it was just one blade. So it cut all my material as if a hoard of hungry mice had been chewing the side of it. Thankfully most of that could be hidden in the seam allowance. I am telling you this because some people seem to think everything I do is perfect and I never make a mistake. Of course I do! If I didn’t make any mistakes I’d never learn anything. I want you to know mistakes are ok, even if I am known on Instagram now to some people as “Two Blades Rach”. It’s quite funny really!


Once I had made all my blocks I sat down and worked out the plan of my triangles. It was important that I did this so I knew how my rows would go together. I also wanted to place certain fabrics together so they had a bigger impact rather than drowning each other out. I did a full size quilt plan and then I broke that quilt plan down into two.


Once my blocks were made I then put them away in a box and cracked on with a lot of makes for other people, birthday presents, thank you gifts and of course fathers day. I made Jay an Owl soft toy for father’s day which you can see on last week’s blog post. I also made him this lavender pillow


Front


Completed lavender pillow


Tula Pink Fabric back of pillow

I kept putting off making my quilt as I was terrified all the blocks would be all the wrong size and it would be a disaster. It is quite common for me to ignore a project for a bit if I am feeling anxious about it. I also have to be in the mood to sew certain things. I have to be in the mood to make clothes – I find it boring and hard work because I have such a skills gap. I have to be in the mood to quilt as it takes a long time and you can be doing the same thing over and over. It also involves a lot of pressing which in this heat you really don’t want to be doing. It wasn’t until I started making quilts that I learned there was an actual difference between ironing something and pressing something.


Last Friday I decided to bite the bullet and put this quilt together. I really hate having WIP’s ( work in progress) hanging around and I don’t do UFO’s (unfinished objects). I have a small house so projects need to be completed and gone rather than hanging around collecting dust! I checked all the sizes of the blocks and as I said earlier realised that some weren’t good enough and needed to be done again. So that added more time onto getting the quilt completed. For me it seems like it’s taken an absolute age to get done but Jay assure me to him it feels like he went to work one day and came back to a completed quilt!


I only managed to sew the rows together that day, as a lot of planning had gone into each row. Checking against my quilt plan I put all the rows in order using post it notes on each – with the fabric order on also, so that the chances of me making a mistake were minimal. I have made mistakes before with my quilt as you go quilts, where I have decided on an order that the blocks would go in. Taken photographs, only to realise once its all been sewn together…………..3 blocks have been sewn upside down totally ruining the pattern I had wanted to create. At the point of discovery of my mistake it was too late, I had sashed and bound it by then. Lesson learned, this time I over planned!


On the Saturday I started to sew my rows together.


As it was only 8 rows it went together very quickly, however disaster struck on the 8th and final row when I realised I had sewn the blocks together in the wrong order. Out came my trusty seam ripper and the blocks were then sewn in the correct order. I am so glad I managed to catch that mistake before continuing as it would have stuck out like a sore thumb otherwise the final row would have been completely different to all the other. If I am honest there was a lot of unpicking as the rows were sewn together as I managed to sew triangles together in the wrong position etc. I never let this wind me up though, I’d rather find a mistake at this point than like the quilt as you go first quilt I made.


I then cut ( using my stripology ruler) my borders for the quilt and sewed those on. At this point I was just totally in awe of what I had created. My first ever quilt top was sewn together. This was a huge moment for me! I then decided **ck it and decided I would baste my quilt. Basting is basically putting on your wadding and backing fabric, to the quilt top. As I didn’t have much room I did it in two halves not ideal but there was nowhere with enough floor space for me to work. I did it using the ironing board, it wasn’t perfect but it was done. I used a temporary glue spray and safety pins around the edges to ensure it was secure.


Sunday was the day I decided to quilt my quilt, that sounds bizarre but a quilt isn’t a quilt until you have sewn all three layers together. This quilt had a very basic pattern just straight line stitches that went through every second row of triangles. I managed to get some floor space in the lounge whilst everyone else was asleep and I marked out the quilting lines with a fabric marker and my huge ruler ( another creative grids one). Thankfully I had set my machine up the day before, so my extension table was on ( I discovered a neat trick as my extension table can move a little, especially when I bash the edge of it by accident, so I used masking tape to keep it in place just taping from one edge of the table to the other sticking it on the bottom of the throat space of my machine – avoiding the needle plate. I only used two strips of tape). I had also ensured that I had rested as much as possible, as I wont sew when I am tired. I started quilting on Sunday afternoon whilst Jay watched the England match. I was finished just after half time. I forgot to say I used my walking foot. I had to unpick a couple of little bits due to puckers and re sew them but its the neatest quilt back I have ever sewn.


Yesterday (Monday) I decided I would make my scrappy binding and then attach it to my quilt. I machine sewed the front of the binding in place using a tutorial from Lucy Brennans https://www.charmaboutyou.com/ blog. It went on very easily and then I had the afternoon to slow sew the binding onto the back. I finished late yesterday afternoon ( lots of frequent breaks as I have been really struggling with double vision the last few days so that makes threading a needle an absolute nightmare).


I had made a label for my quilt on Sunday evening but my eyes were so bad by the time I had finished sewing the binding on that I had to stop. I sewed my label on this morning at around 7am as I had been up for an hour or so by then.


Once the quilt label was on it was time to give it a wash to get rid of the temporary glue and the fabric marker from the quilt lines.


I am so pleased with this quilt I am still in shock that I made this!


And obviously I lied when I said it was going to be a little post, hubby brought our huge fan down from the loft this morning and put in the lounge for me. What a difference that’s made for me and the dogs!


Sewing Secrets

I am officially one of the worlds worst secret keepers! How I have managed to keep the following items a secret over the last few weeks is beyond me. When I make something for someone I always want to give it to them immediately  or I accidentally let slip what it is. This time however I have been strong even though it has been incredibly hard.


A few times recently in blog posts I have said that I have been unable to share what I have been making that week due to it being a present. Thankfully I can now share with you my makes – which I am incredibly proud of as these two birthday girls have received their gifts.


Imogen will be 21 on 23rd June and is incredibly special to both me and Mr Myasthenia Kid. I discussed with him months ago what I would like to make for Imogen’s birthday and he was in full agreement. It took me a little while to source the material as I wanted all kinds of Unicorn fabric but I also wanted it in Pink and Grey so it wasn’t over the top girly.  The first item I made was a 20 inch square cushion cover in a Dresden Plate design


I had a bit of a nightmare with the cushion pad as although it was sold as a 20 inch cushion pad, it was actually a lot bigger. I, being a novice and idiot didn’t think to measure the cushion pad before I started making the cushion. I just presumed that if something was being sold as a 20 inch square cushion pad that is exactly what it would be.  So when I placed the cushion pad inside the cover it looked terrible – in fact stuffed sausage would be an accurate description. I was almost in tears as I had worked so hard. So I decided to measure my completed cushion cover and make my own cushion pad to fit it. I used my overlocker to do the edges of the cushion pad and the ladder stitched it closed once I had placed the stuffing inside. I took apart the bought cushion pad and ended up with two nice squares of white fabric and a little excess stuffing.

I also wanted to make Imogen a quilted patchwork Tote bag. I had already made one as a project in my subscription box was this exact thing and they had sent out 42 charm squares, lining and webbing for it to be completed. I had really enjoyed putting it together and couldn’t get over how much I was using the bag as it was so roomy yet so light weight. So I made my own charm squares and bought the webbing online andknocked up one for Imogen.


I scotch guarded both the cushion and the bag to help resist stains. Imogen can be a little clumsy the same way I can. I also gave washing and ironing instructions with each.


Last week on the spur of the moment I decided to add something extra to Imogen’s gift. I had been doing some redwork for my other friends gift but want to change it up a bit so I found a  unicorn design online, unfortunately there is no attribution for this work so I can’t give credit to the artist. I did change it up just slightly by putting a heart around it and not using the words that had been printed under the design. Here is the finished item


I have filled the inside of the cushion with a mixture of stuffing and dried lavender. It smells divine and the whole house smelt of it for a few hours as I filled several lavender pillows that day. I again provided washing instructions / care instructions just in case. Imogen was given her gifts on Saturday. The message she sent me after opening them was so lovely it made me cry, then Imogen’s mum Helen sent me a message in the evening which was really lovely too and that made me cry as well. It’s really nice when you have spent hours working on an item and the person is overwhelmed by it and is truly grateful for them.


My oldest Exmouth friend Ellie also has a birthday in June ( not until the 30th but with works schedules etc it was difficult to know when I would see her next) . I gave her the gifts I had made this morning.


This is a redwork lavender pillow. The redwork design was free from a site called https://www.birdbraindesigns.net/ which has some really lovely designs on there. I added my own embellishments to the design and also added Ellie’s initial to make it even more personal.


This has again been filled with stuffing and lavender. It’s a lovely small size that could be placed under a pillow or in a drawer to leave the scent of lavender behind. I have really enjoyed doing the redwork and have made several more as gifts for people. They take me several hours to do but I really enjoy sewing them. The stitches on these and the unicorn cushion are very basic just a running stitch, back-stitch and french knot are all that are needed to create something that can look quite stunning.


The second part of Ellie’s gift had been in the planning stages for ages. I was scared to start it as it was something different than I had ever made before. Plus I kept adding to the level of difficulty. It was the first time I had used the product Odecoat which ( depending on how much you use) can make something totally waterproof. I did enough to make the item water-resistant / stain resistant inside and out.  This was also the first time I had used my machines embroidery functions, I also used the memory function. I used an iron on stabiliser as well and proper embroidery thread. So it was a project of firsts. The pattern comes from Lucy Brennans blog / website https://www.charmaboutyou.com/ and the pattern is the #pieceofmepouch. It’s so stunning and once I had my head around it not difficult to make. I also have to say a massive thank you to Lucy who helped me out when I was being a bit dim and not understanding the pattern. Lucy is always so encouraging and supportive, I can’t thank her enough.


This week I also had to make my dads father’s day gift.This had been rattling around in my brain for weeks. I knew I wanted to make him something that was special and a one-off but what. I decided after gaining confidence making the piece of me pouch that I could use aspects of that and make my dad a bag to carry his (clean and empty) dog poo bags. I decided that I wanted curved edges on the top, that I wanted it to be 3D rather than 2D. I wanted a loop on the back so he could attach it to a belt and I also wanted a clip on it so that should he not be wearing a belt he could attach it to his belt loops. It also had to be small enough that it would impede his walking.


In my mind’s eye I could see exactly what I wanted so last Wednesday morning I sat with an empty bonio box ( dog biscuits)  in front of me and made my template. I used Odecoat again to help make the fabric water-resistant and to make it a bit stiffer. Also when I quilted it, I made the lines much closer together as I knew this would make it much more rigid. I am delighted with the way it’s turned out. Unfortunately due to a series of events out of both of our control I have been unable to give it to him as yet. I am pretty sure he doesn’t read my blog – mum does so I will be safe posting it here.


My last make of the week was this Owl stuffed toy for Jamie, it was his father’s day present from the dogs.


I absolutely adore this and it looks so cool on his bed! So far the dogs have left it alone.


* * *

Health wise I have been up and down. The heat had been causing a lot more ptosis than normal. I can really feel the mestinon wearing off after a few hours so I have had to been really strict with my dosing schedule. As once I get full-blown ptosis it can be difficult to shift.


I managed to have a large abscess develop under my breast due to the chronic skin condition Hidradenitis Suppurativa. Tuesday afternoon this decided to erupt and immediately go into cellulitis. My breast was so painful I couldn’t wear a bra. Thankfully the antibiotics had it  gone right down within 3 days.


A few days over this last week I have been woken up in the night in a lot of pain with a headache ( not a migraine) . I managed to work out on Sunday that it had been due to the position I had been holding my neck in whilst sewing. This was causing me pain through my collar-bone and deep into the soft tissue of my neck. This was then causing me to have awful headaches. I actually got very paranoid that my CSF leak was back, until Mr Myasthenia Kid pointed out that Leak headaches don’t start when you are lying down, they start on sitting up. This headache was with me whatever position I was in. It was not a leak headache more poor posture due to the heat making my muscles weaker than normal.


This morning I woke up with a bad pain under my sternum and a burning feeling in the back of my throat. I immediately worked out that when I had taken my 4am antibiotic (despite drinking loads) it had become stuck in my gullet. The tablet had dissolved in the back of my throat and burnt the tissue. I have been drinking gaviscon straight from the bottle and drinking only water to settle it down. It is feeling better than it was but there is still a burning pain. I have had issues with taking capsules for years due to problems with my swallowing. This just highlights again how much weaker this has become during the heat.


So although it may seem like I must be doing ok because I have sewn loads don’t let online appearances fool you. Everyday I am on the maximum amount of painkillers I can take as my back is so awful at the moment I have been having pins and needles in both legs. I’m either too hot and feeling faint or feeling cold thanks to my wonky Autonomic nervous system. I am just determined to do my best every day and be the best that I can be and let the creative juices flow. It is what makes me happy. It doesn’t take away all the shitty  health conditions I am living with every day of my life.